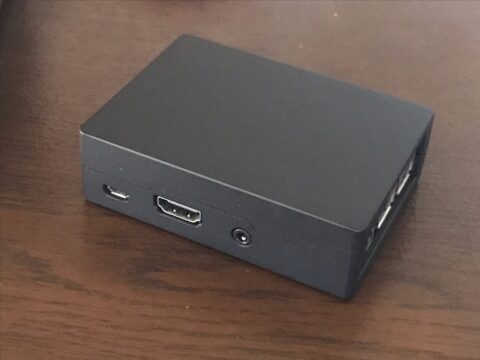
How to View RTSP by Raspberry Pi 3 Using ffplay (FFMPEG)

The following article is outdated. For the Raspberry Pi OS only, you can use VLC to watch RTSP as of 3 November 2023.

Original Article follows;

For Raspberry Pis, there are many outdated or sometimes harmful guides to watching video streams (RTSP) generated by webcams. The biggest issue obstructing the approach is that Debian removed RTSP capability from the VLC media player. People who want to simply watch RTSP on the Raspberry Pi are straying.

The goal of this article is to run ffplay on the Raspberry Pi OS automatically.

Disclaimer

The first purpose of this article is to record what I did. However, I am happy if this will be helpful to someone, no matter how much or little. I would like to state this article is based on GPLv3. No warranty at all.

Prior Information

  • The information in this article is tested on Raspberry Pi 3 Model B (RPi3) and Raspberry Pi 3 Model B+ (RPi3+) both of them have 1GB RAM. Raspberry Pi 4 Model B is not tested but may work as well.
  • URL to webcam is in the form of “rtsp://user_id:password@ipaddress/designated_string”
  • Used OS is Raspberry Pi OS bullseye. The next generation, bookworm, will be released soon. This article will or will not be updated after bookworm release.

Raspberry Pi OS installation

Details of the OS installation are omitted in this article because there are many guides, including official and unofficial ones. It is lucky if you find one that suits to you. The installation is not difficult, so you can manage to install it even if the guide you found is not friendly.

The recommendable points are as follows:

  • Install Raspberry Pi OS (64bit) full version, not the LITE version.
  • Enable auto-login (just according to the default).
  • Disable screen blanking.
  • Enable the ssh server (sshd).

The following section assumes the WiFi setup is finished and that all packages have been updated.

Recommended Option: Zram

This is not a must, but I strongly recommend installing ZRAM. Many distros enable ZRAM on their default installation today, but Raspberry Pi OS bullseye doesn’t.

Installation is not difficult. Just install zram-tools with an apt command like,

sudo apt install zram-tools

then swap on the RAM with compression starts functioning. ZRAM has extremely high priority, so the bullseye default, swap-on-file, will never work again. Because the swap file remains just a huge, redundant file, you may want to remove it. It is removed as follows:

sudo systemctl stop dphys-swapfile
sudo systemctl disable dphys-swapfile
sudo rm -v /var/swap

Test ffplay

During the OS installation, you have a mouse, a keyboard, and a monitor connected to the RPi3(+). Keep them connected until the set-up finishes.

The program to view RTSP, ffplay, is included in the FFMPEG package that comes with the Raspberry Pi OS. Open a terminal and execute the next command as a user.

ffplay -fs -loglevel quiet rtsp://user_id:password@ip_address/designated_string

where use_id, password, ip_address, and designated_string are those of the corresponding webcam.

If you get a full-screen video stream, you are one step closer. If you can’t, I can just say “It depends.”

Type “q” to quit the video.

Next, create a shell script file as a user with your favorite editor. You can name it whatever you like. For simplicity, it is named “run_ffplay.sh” here. Inside, it is like,

#!/bin/sh
sleep 20
/usr/bin/ffplay -fs -loglevel quiet rtsp://user_id:password@ip_address/designated_string >/dev/null 2>&1 &

This script sleeps 20 seconds before the execution of ffplay. I don’t know if 20 seconds is optimum. Please trim it if you like.

You can place the script file wherever you want, but your home directory is safe. Then give it execute permission.

chmod a+x run_ffplay.sh

Just run the script to see if you get a full-screen video again.

./run_ffplay.sh

Again, type “q” to quit.

Autostart

You need to create an autostart configuration file in the directory "~/.config/autostart/". By the default of bullseye installation, "~/.config" has been created then you will need,

mkdir ~/.config/autostart

Then create a file named “ffplay.desktop” in the directory with your editor. The contents will like,

[Desktop Entry]
Type=Application
Name=ffplay
Exec=/THE/PATH/TO/run_ffplay.sh

I know I’m being nosy, but /THE/PATH/TO should be the path to run_ffplay.sh. All done; just cross-finger and sudo reboot; exit.

If success, you can remove the mouse and the keyboard.

Shutdown

Unfortunately, there is no smart shutdown method provided without a keyboard and a mouse. Login to the box via ssh from another PC, then execute the command sudo poweroff. Installing an electrical switch on the GPIO and configuring it will be fun. LIRC will be a smarter alternative.

Conclusion

Since Debian removed RTSP capability from the VLC media player, many people are struggling. You can use ffplay of the FFMPEG package as an alternative.

; exit may be redundant.
Or simply poweroff may work.

監視カメラ再起動

その色々な事情です.

政府は監視カメラでなくて防犯カメラと言わせたいらしく,その意を汲んでNHKはじめメディアもたいてい「防犯カメラ」と呼称しています.

今回犬のモニター用にカメラを買いました.これはどう考えても防犯カメラではありません.他人の家に忍び込んで犬を盗む泥棒がいないとは断言できませんが,少なくとも設置主にはそうした犯罪を防ぐ意図は微塵もないから「防犯カメラ」であろうはずがありません.

今回買ったのはアトムテックのATOM Cam2とATOM Cam Swing各1台です.実は3年前程にATOM Cam 2を買って玄関に取り付けていたのですが,途中で動かなくなり,サポートに連絡し症状を説明したら故障のようなので交換しますとのことで交換品を受け取りました.その交換品も数か月して動かなくなりましたが,また交換してもなあとあきらめて放置していました.いや放置でなくて「ダミーカメラ」として設置したままにしていました.

そのワン子ですが,昼間はたいていいい子で昼寝をしているので,この時間なら大丈夫だろうと庭仕事をして戻ると大変な状況になっていることが最近しばしばあります.前から,モニター用のカメラはあれば便利かなと思っていましたが,これは至急買わなければということでSwingを買うことに決めましたが,2台でも送料は変わらないと思うので玄関に付けているCam 2のほうも新しいのと交換することにしました.

なお,ATOM Cam 2でこりたはずなんですが,その後代わるカメラを探してもなかなかいいのがなく,おもちゃみたいな値段なのでおもちゃだと割り切って買うことにしました.

先にATOM Cam Swingの方を起動させてみました.設定方法は既にATOM Cam 2で何度も実行しているのでなんの支障もありませんでした.付属してきたUSBケーブルとUSB電源アダプターを接続してリセットスイッチを押すと設定モードに入ります.強いて困難を探せば,アプリのログインパスワードを忘れてしまい某重要機密メモを参照しないといけませんでした.

また設置についても屋内なので適当にあいているテーブルタップに付属のUSB電源とケーブルを繋いだだけです.ただし,firmware updateがあり少々を時間を取られました.

ATOM Cam 2の交換は翌日に行いました.まずは設定を室内で行いました.同じく付属してきたUSBケーブルとUSB電源アダプターを接続してリセットスイッチを押して設定モードに入り,firmwareのupdateまで済ませました.

次にまだ暑い中,玄関ポーチの屋根に逆さまにぶら下がっているもともとあるATOM Cam 2の木ネジを外して新しいのに取り替え,2階の書斎まで引いてある電源ケーブルをATOM Cam 2専用のUSB電源アダプターにつなぎました.しかし,動いてくれません.

原因を見つけなければいけません.まずUSB電源アダプターにLightningケーブルを繋いでiPhoneをつなぐと充電が始まりますから,AC電源〜USB電源アダプターまでは問題なしです.次にUSB延長ケーブルをUSBアダプターにつないで,玄関ポーチの側のUSB microコネクターに他の機器をつないでみても電源を繋いで反応なしです.となると,延長ケーブルが疑わしいです.

延長ケーブルは2メーターほどのUSB Type-Aのオスメスのついたケーブルで,長さが足りないから間に5mほど適当なキャプタイヤーケーブルを繋ぎ込んでいます.キャプタイヤーケーブルは8芯ですがATOM Cam 2は電源の+/-の2芯しか使っていませんのであとは風で揺られないための重しみたいなもんです.

そういうわけで2か所はんだ付け箇所があるわけですが,ダメージを受ける可能性の高い屋外部分の方(カメラに近い方)を先に調べてみました.

USB Type-AのレセプタクルとATOM Cam 2専用USBケーブルの接続部分の自己融着テープを開いてみると,なんと完全に錆びています.はんだ付け部分は関係ありませんでした.

錆びたUSB Type-A R/P

ブレーキ&パーツクリーナーで洗浄したあと,正常なUSBコネクターに接続してテストしましたが,どちらもも全く導通しませんでした.

困るのは,ATOM Cam 2用のUSBケーブル(写真の左側)は特殊で,カメラに差すmicro USBコネクターの外装がカメラの穴とぴったり合うようにできていて,それで防水効果を持たせている構造になっています.ですから,前回と同じことをしようと思ったらケーブルを購入する必要があります.そして延長ケーブル側のUSB Type-Aレセプタクルについても入手する必要があります.

しかし,それぞれを入手したとしても完全な防水処理を施せるかは甚だ疑問です.

そこで最終的に考えついたのは,「切ってつないでしまえ」ということです.切ってはんだ付けでつないでしまえば仮に雨水が染み込んだとしても簡単には接触不良は起きませんし,仮に腐食してもまた数センチずつ切ってつなぎ直せば良いだけの話です.

まあ,考えてみれば,これまでは必ず「切ってつなぐ」を王道として採用してきたのですが前回何故それをしなかったか思い起こすと,たぶん専用のUSB電源ケーブルを傷つけたくなかったと考えたのだと思います.

切ってつなぐと決まれば話は簡単で,適当に切ってはんだ付けして熱収縮チューブでカバーしました.ガス式はんだごてのバーナー用の先端金具を紛失してしまい,熱収縮チューブの収縮ムラがどうしてもあるので,たぶんまた雨水は侵入すると思いますが,まあ,大丈夫でしょう.

カメラは問題なく起動しました.

古い「ダミーカメラ」のほうも,電源が来てないだけで活きていましたので,これは予備機として活用する予定です.

GoProもどきのアクションカメラを使いました.

ManjaroのVLCもRTSP NGか

色々事情がありまして,しばらくRTSPを視聴せずに来ましたが,また必要にかられて再開しました.

macOSでVLCの本家からdownloadしたVLC media playerは,従来どおり難なく視聴できます.たぶんWindowsでも本家からdownloadすれば使えると思います.

ところが,Manjaro (AMD64版)では視聴できなくなっていました.Debian同様ソースコードにライセンス上の問題があるとかそういう関係でRTSPの機能を除外してしまったのでしょうか

ManjaroでRTSPが視聴可能というのは,Raspberry Piでも視聴可能にできるという大きな意義があったのですが,それができないとなると,Raspberry Piでの監視カメラシステム構築に大きな支障となってしまいます.

さてどうするか

ManjaroのVLCでRTSPの再生ができないことを他のいくつかの環境からテストしてみます.それで確定となれば新しいdistroを探さなければなりません.

Slackwareではsbopkgでbuildできることが解っています.しかし,slackbuilds.orgに登録されているスクリプトは,すべてのアーキテクチャでエラー無くbuildできるとは限りません.特に最終ゴールはRaspberry Pi 3なので,AMD64やx86環境はOKでもaarch64環境でbuildができる可能性は低いと考えています.

それと,依存ファイルの多さです.35もあります.オプショナルなモジュールならば無くてもVLCのbuildスクリプトがその機能を除外して先に進んでくれるようですが,必須のライブラリーがbuildできないとそこでアウトです.一番成功の可能性が高いAMD64でのbuildも躊躇してしまいます.

筆者にはその辺の事情は関係ないので調べません😅
日本の政府やメディアは「防犯カメラ」と呼ばせたいようですが.

防犯カメラで悩む

一昨年の秋にあるベンチャーの防犯カメラを購入しました。最初は非常にいい感じで動いていたのですが翌年に入ってから時々Wi-Fiとの接続が切れるようになりました。それでもしばらくすると復活するまでそのまま使っていましたが夏には全く応答しなくなりました。本体のリセットなども試みましたが全く動いてくれません。そこでサポートに問い合わせたところ新しいものとの交換になりました。

交換品はもちろん最初はちゃんと動きましたがこれも1か月ほどで全くWi-Fiとつながらなくなりました。

結局二台立て続けで壊れたと言うことで、もう二度と買いたくない気持ちになりました。

それでモーションキャプチャーなどのソフトウェア処理はRaspberry Piでやることにして、防水で暗視機能があるUSBカメラをいろいろ探しました。しかし防犯カメラ機能がない単純なUSBカメラで目的に叶いそうな(防水で暗視機能が付いていて値段も高くない)ものがなかなか見つからず困っています。

そもそも一昨年、使えそうなUSBカメラがなかなか見つからないところ、知り合いからこのベンチャーの防犯カメラを教えてもらって買ったと言う経緯がありますので、1年ぐらい経ったところで同じように探しても、結局いきつくところはこのベンチャーのカメラになってしまいます。完全な敗北です。

負けを受け入れて買うしかないかな😓

2021年10月.
2022年.